Saturday, June 28, 2014

Koko Head (AKA, the ultimate stairmaster)


This post is about one of the most deceptively difficult hikes here on Oahu.  Koko Head Crater hike seems like it should be pretty straightforward and easy.

"A hike on an old rail bed? No problem!"

"1.5 miles round trip?  No sweat!"

"I climb 2 flights of stairs to my desk every day, so this will basically be the same."

"I did Diamond Head yesterday. Koko Head is basically the same, right?"

Wrong.  This hike will destroy your legs and make your heart pump out of your chest while vertigo threatens to rip you right off the side of the mountain.


OK, so it's not that bad.  However, most people underestimate this hike for one reason or another, and you find them on the side of the trail halfway up sucking wind as though they were climbing Everest. 

This hike has 1,048 old railroad ties that act as stairs.  To put this in perspective, the Statue of Liberty has 358 stairs, and the Tower formerly known as Sears in Chicago has 2,109 stairs.  Hiking Koko Head is like climbing the Statue of Liberty thrice, or ascending halfway up the Willis Tower.


Standing at the bottom of the hike looking up at the feat that lies ahead, one can quickly regret the decision to come out here at all.  However, you see so many other people of all ages and levels of fitness, so you tell yourself it's not going to be that bad.  Up you go.

The trail starts off relatively flat and gains elevation gradually.  You tell yourself you are doing awesomely well.  You start climbing a little faster, maybe even taking two stairs at a time.  Then the hard parts really kick in.  Before you are 25% of the way up you will swear to yourself the air is thinner up there.  It's really not.


Before long you will be telling your hiking partner that you need to stop to, um, admire the view.  That is a good excuse because you will quickly get some nice views of Hanauma Bay and East Oahu.  Your friend will only buy that excuse so many times, so you will have to think of a better one before your lungs fail you again.

At this point, you probably wish you had decided to go snorkeling instead.

So you press on.  About two thirds of the way up you come to an interesting decision point.  Here you find a small rail bridge.  Well, it looks small, but there is quite a drop.  So your choices are thus: try to cross this bridge that will make you feel like you are in an Indiana Jones movie, or take the easy path that only kids and dogs use.

Safety standards?  We don't need no stinkin' safety standards!

After you take the side path and meet up with the rail again, the hike only gets tougher.  The climb gets more vertical, and the steps seem farther apart. The first time I did this hike, I had to stop about every 10 steps or so to catch my breath.  You will want to rest frequently.  Please resist the urge to shove those health nuts that have already sprinted past you about 5 times while doing laps up and down.  (Is this fun to them?)

I feel your pain, #23

One more hump to go and you can see the goal.  You probably have never been happier to see a dilapidated, graffiti-ed old building as you approach the summit.  Once you reach step #1048, you are so proud of yourself for accomplishing this and so elated by the stunning views that you almost forget you have to do the whole thing again, but going down.  You then wish there was a zipline here to take you all the way back down.  (How cool would that be?!?!)  I swear Honolulu County is missing out on a great money making opportunity here.


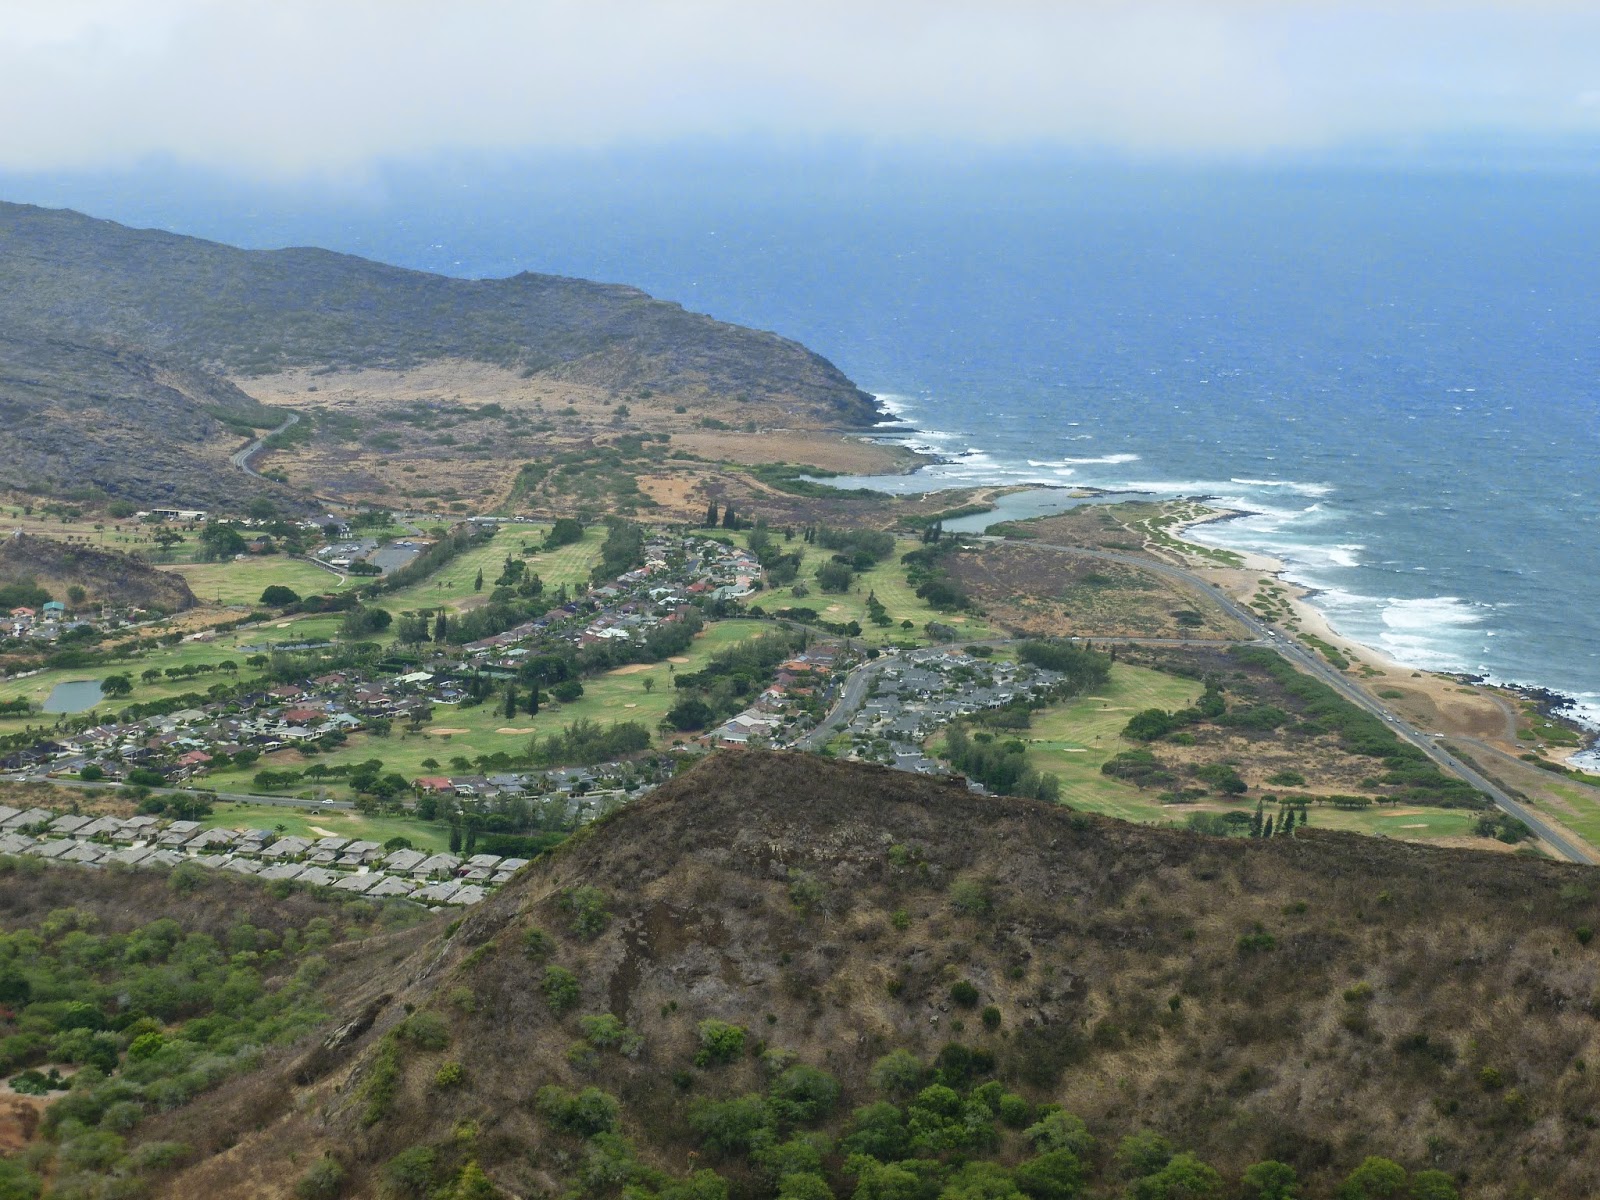
At the top of the railway, you have some side paths that lead to stunning views of East Oahu and beyond.  Even though you just hauled up all those stairs, it's worth the little bit more for a very scenic place to suck down water.


Last time I was there, I noticed this Prayer Box.  I can only assume it is so you can pray to make it down without tumbling and hitting all 1,048 rail ties on the way down.


On the way back down, you might be pretty proud of yourself for making it all the way up the mountain.  You might also be thinking "remember that bridge I was scared of?  I think I'll try to cross it this time."  This is one of those times you need to tell your inner monologue to take a back seat.  If you think this bridge is scary going up, it is that much more so going down because of a thing called gravity.  Just take the side road again, but feel free to tell your beer buddies that you conquered that bridge like a boss.


 This truly is a fantastic hike.  It is a fairly short hike despite all the stopping.  It offers fantastic views of the island, and you will feel like a champion for making it all the way up and down again.  Way to go you.  Now head over to Kona Brewing Company for some beer and lunch.  You earned it.


Thursday, May 15, 2014

Lanikai Pillbox Hike (Ka'iwa Ridge Trail)


This hike is one of my absolute favorite hikes on the island.  It is short, kid-friendly, close to my house, and offers a relatively high reward for the little amount of effort it takes to get here.  It offers fantastic sweeping views of the windward side of Oahu from Kaneohe all the way to Waimanalo, Bellows, and beyond.  It prominently features the two mascots of Kailua and Lanikai- the Mokulua Islands.


Na Mokulua, the official name for the islands, means "the two islands" in Hawaiian. (I believe "Na" itself is short for "Na Really").  The one on the left is Moku Nui.  The one on the right is Moku Iki.  Most people just call them "the Mokes."


Both are bird sanctuaries and visits are regulated by the Department of Land and Natural Resources.  Many people kayak there from Kailua Beach, but you must buy a permit for landing on the beach of Moku Nui.  Moku Iki doesn't have a beach at all, so it's not really possible to land a kayak there.


Hey man, you're wrecking my aloha


The one bad thing about this hike is parking is extremely limited.  There are a few spots on the side of the road near the trail head, but once those are taken you must use street parking in front of someone's house.  As you can imagine, the locals have had many problems with hikers blocking driveways, leaving trash in their yards, using their hoses without permission, being loud and disruptive, and other such lapses in common courtesy.  If you hike here (or anywhere, really), be respectful of the residents and act like you are a guest on their land.


This hike is a fairly short climb through a wooded area followed by a bit of ridge walking.  My wife gets scared every time we let the kids wander around by themselves because she is afraid they will go tumbling down the mountain.  I am proud to say we have yet to lose a kid on this hike.


The trail leads to two World War II-era defensive positions (hence the "Pillbox").  The large guns and other fun stuff have long since been removed, but you are instead treated to a gallery of artwork from local youths.


I am told the trail continues to a third pillbox, but most people turn around at the second pillbox.  I have never ventured much past #2, despite the many times I have done this hike.


One of the things I like best about this hike is the opportunity to see just how clear the water is over here.  The light blue colors are the sand, the brownish colors are the coral.  Look how easy it is to see to the bottom even from this height.  (This also makes for great snorkeling)


Many people venture here to watch the sun rise.  I am normally not that masochistic.  However, I did make it up here one morning that I woke up early intending to do the Haiku Stairs again, but was turned away by some local fuzz. I think it worked out well for me.


I had the pillboxes to myself for a few hours and I took the opportunity to attempt some star trails.


Overall, this is a fantastic hike with a great payoff for a little amount of effort.  I would recommend this to anyone.


Monday, September 2, 2013

Mariner's Ridge:The Adventures of Staley the Dog


In my never-ending quest to trek all the hiking trails in Hawaii, I am always looking for family-friendly trails.  There are a handful of hiking trails that are appropriate for kids of all ages.  We thought Mariner's Ridge was one of them...


The reviews on the interwebs say it takes people about an hour to get to the top of this trail, and 45 mins to come back.  So we planned on spending 3 hours on the trail, thinking that shirley would be more than enough time for us.  After 2 hours of climbing and trodding, we were only about 2/3 of the way there.  I guess toddlers hike at about 1/3 speed of regular adults. 


Had we continued on this trail, it would have taken us at least 5 hours.  On this day, we decided to turn back but vowed to return again another day.


When I found time to attempt the hike again, I decided to being my trusty sidekick, Staley.


Bonus points if anyone knows why I named my dog Staley.


I wasn't quite sure how she would fare because it has been a long time since I have taken her on a long excursion.  Her brother has a bum leg and he doesn't always get along with other doggies.  So Staley doesn't get a whole lot of one-on-one time with me out in the open.


This trail starts out like many hikes here on Oahu- with an ominous "No Trespassing" sign.  This only serves to ward off some ignorant tourists.  So under the chain and onward we go.


Since this trail starts out high on a hill, it isn't long before we get to some really nice views of Diamond Head, Hanauma Bay, and houses that cost more money than I will make in my entire life.


Over the ridge and through the forest, this trail has several switchbacks and some easy rocks to scale.  Staley handled everything with ease, and only nearly fell off the mountain a few times.


At the end of the trail is a fantastic landing area that has some sweeping views of eastern Oahu.  It was a bit cloudy and rainy on the day I went, but I can imagine how spectacular the view would have been.


All in all it is a fairly easy hike with great views.  It is easy enough for a toddler to scale, but we needed to plan for much more time.


Here are some pictures where I was playing with my macro lens.


And here are some more random pictures of the hike.  Thanks for reading!